
About LNFI
Lnfi Network is a Layer 2.5 solution designed to bring Web3 and tokenization into the Lightning Network. It introduces LightningFi (LNFI), a financial layer that supports sending/receiving, issuing, distributing, fundraising, staking, locking, gifting, and trading of Taproot assets via Nostr.
LNFI Transfer and Deposit Guide
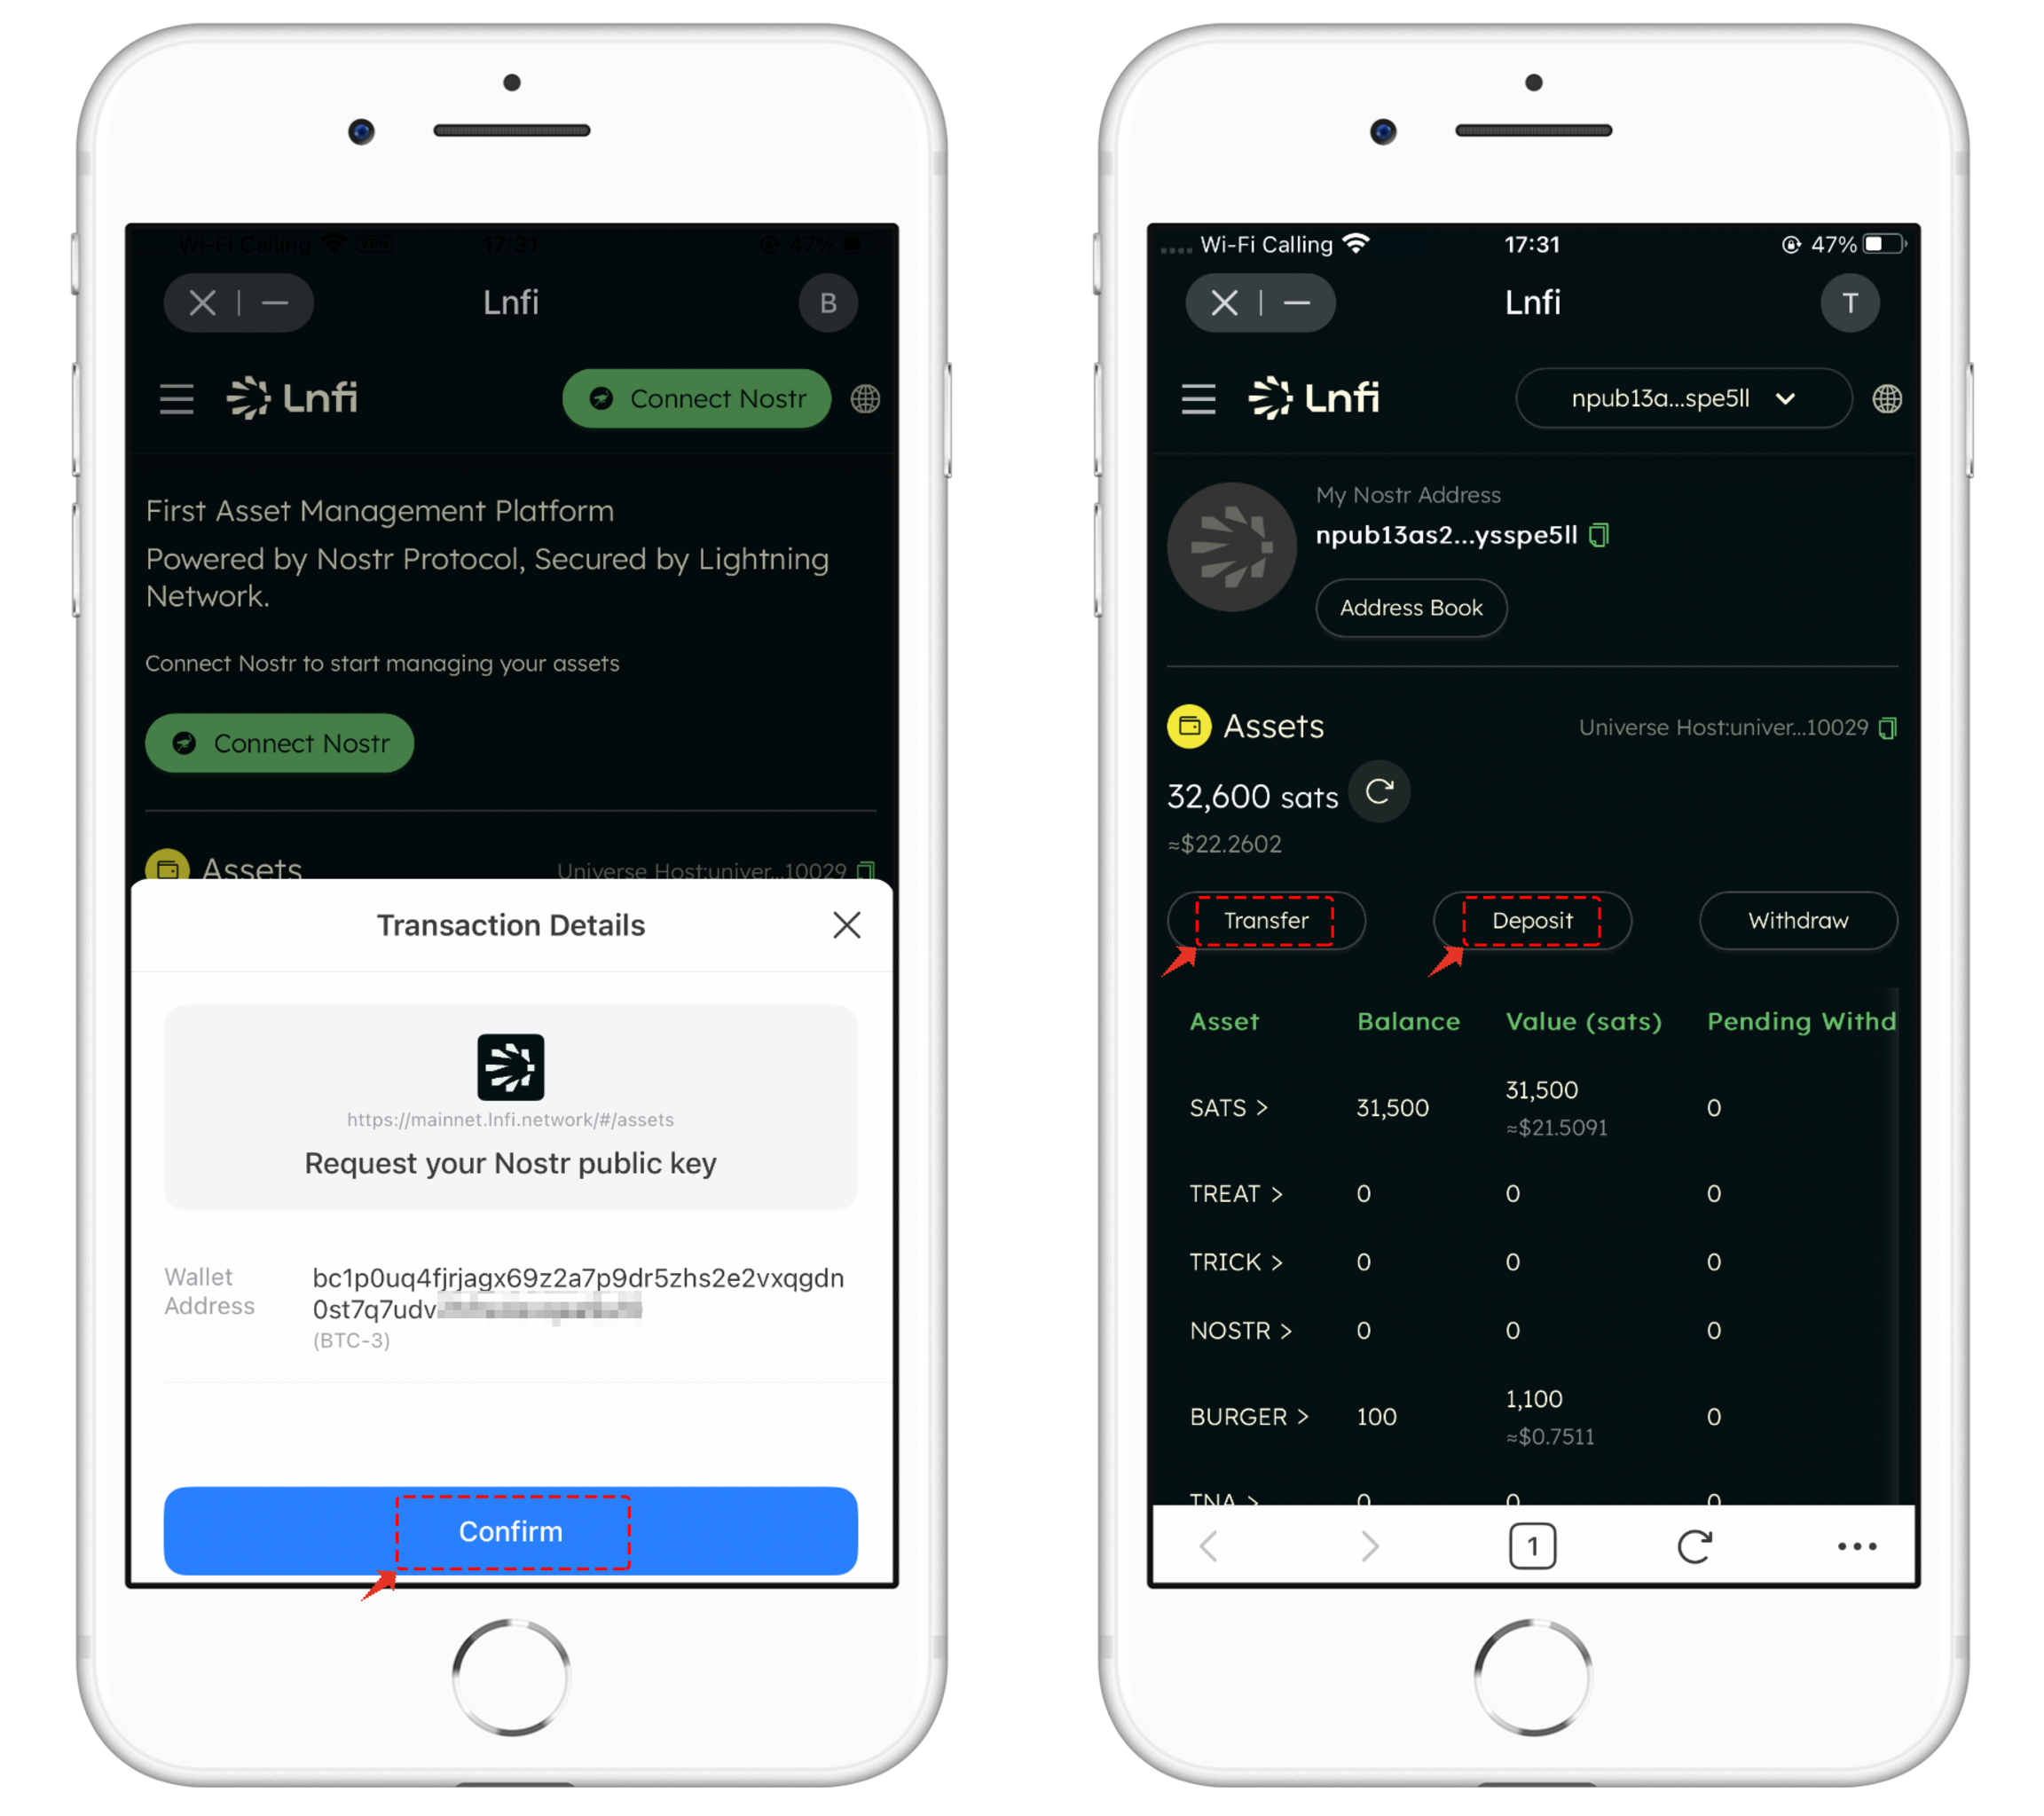
- Open TokenPocket, click on [Discover] , and find LNFI in the popular DApp section.

2. Lnfi requires a signature to read the Nostr public key. After clicking [Confirm] , the wallet will automatically connect. In the main interface of Lnfi, you will see the [Transfer] and [Deposit] menus.
3. The transfer function is straightforward and similar to using a regular wallet. You simply select the token to transfer, set the recipient’s address, and input the amount. Then, click [Transfer] to execute the transaction.
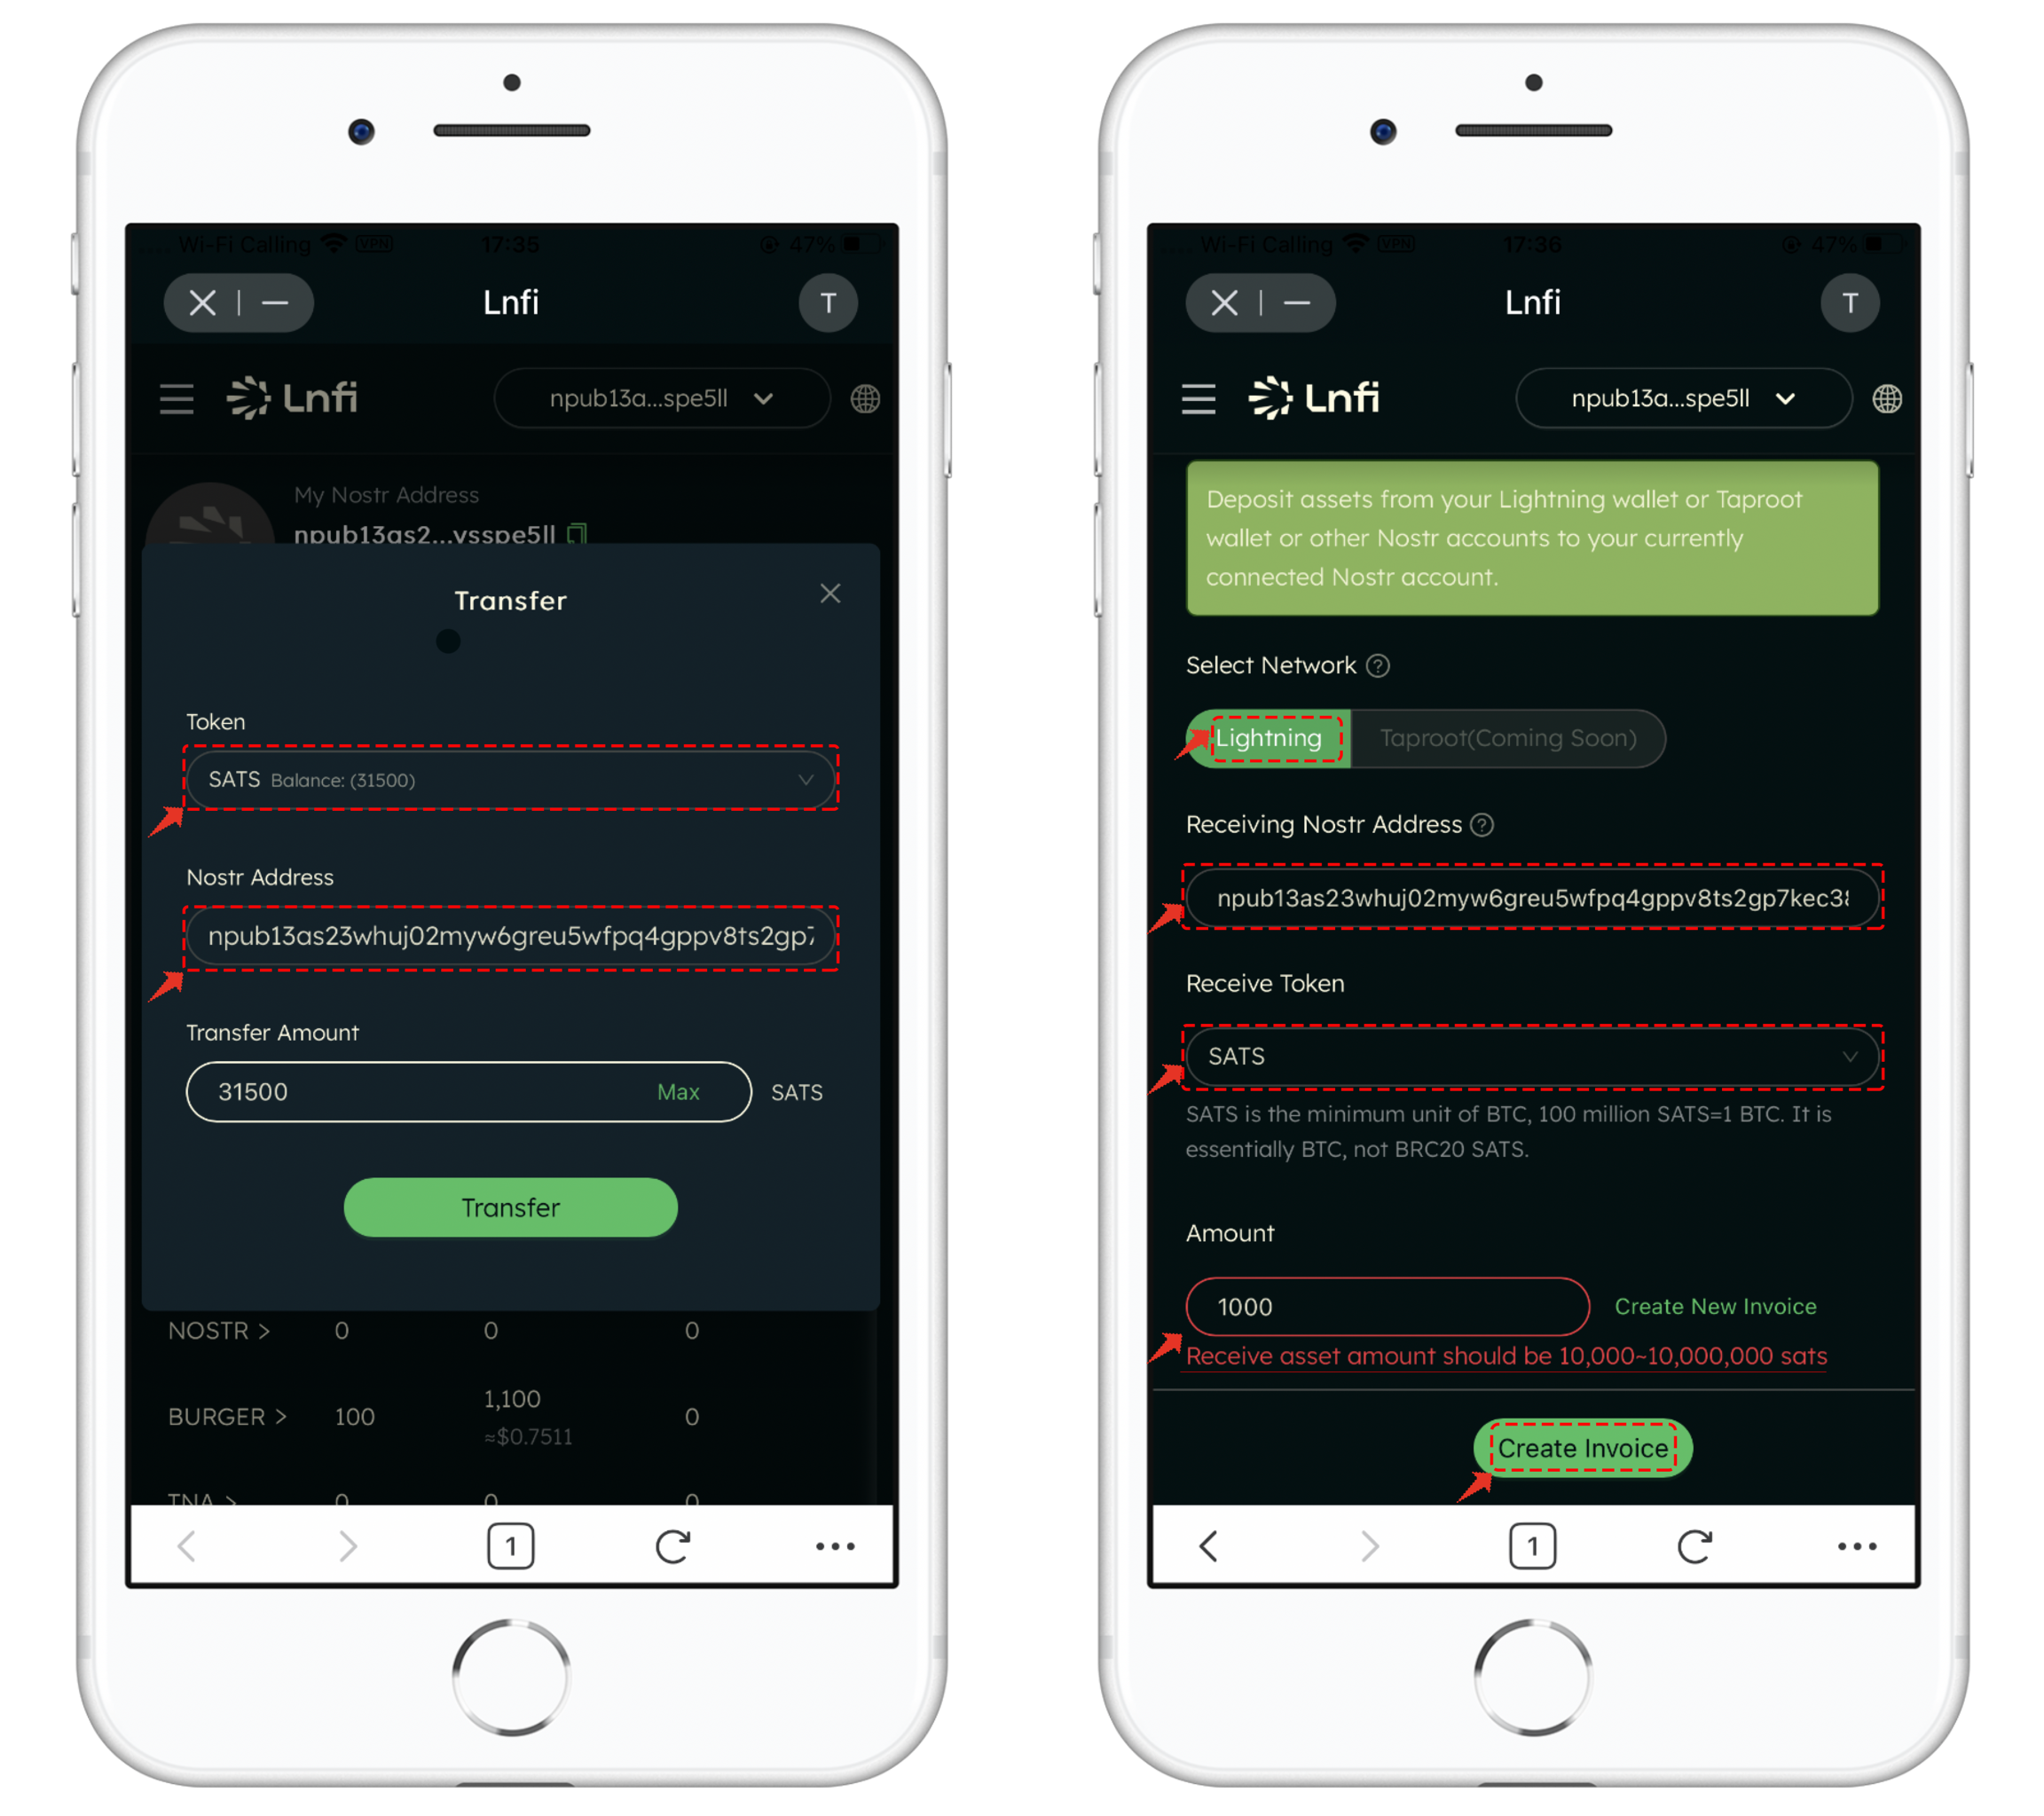
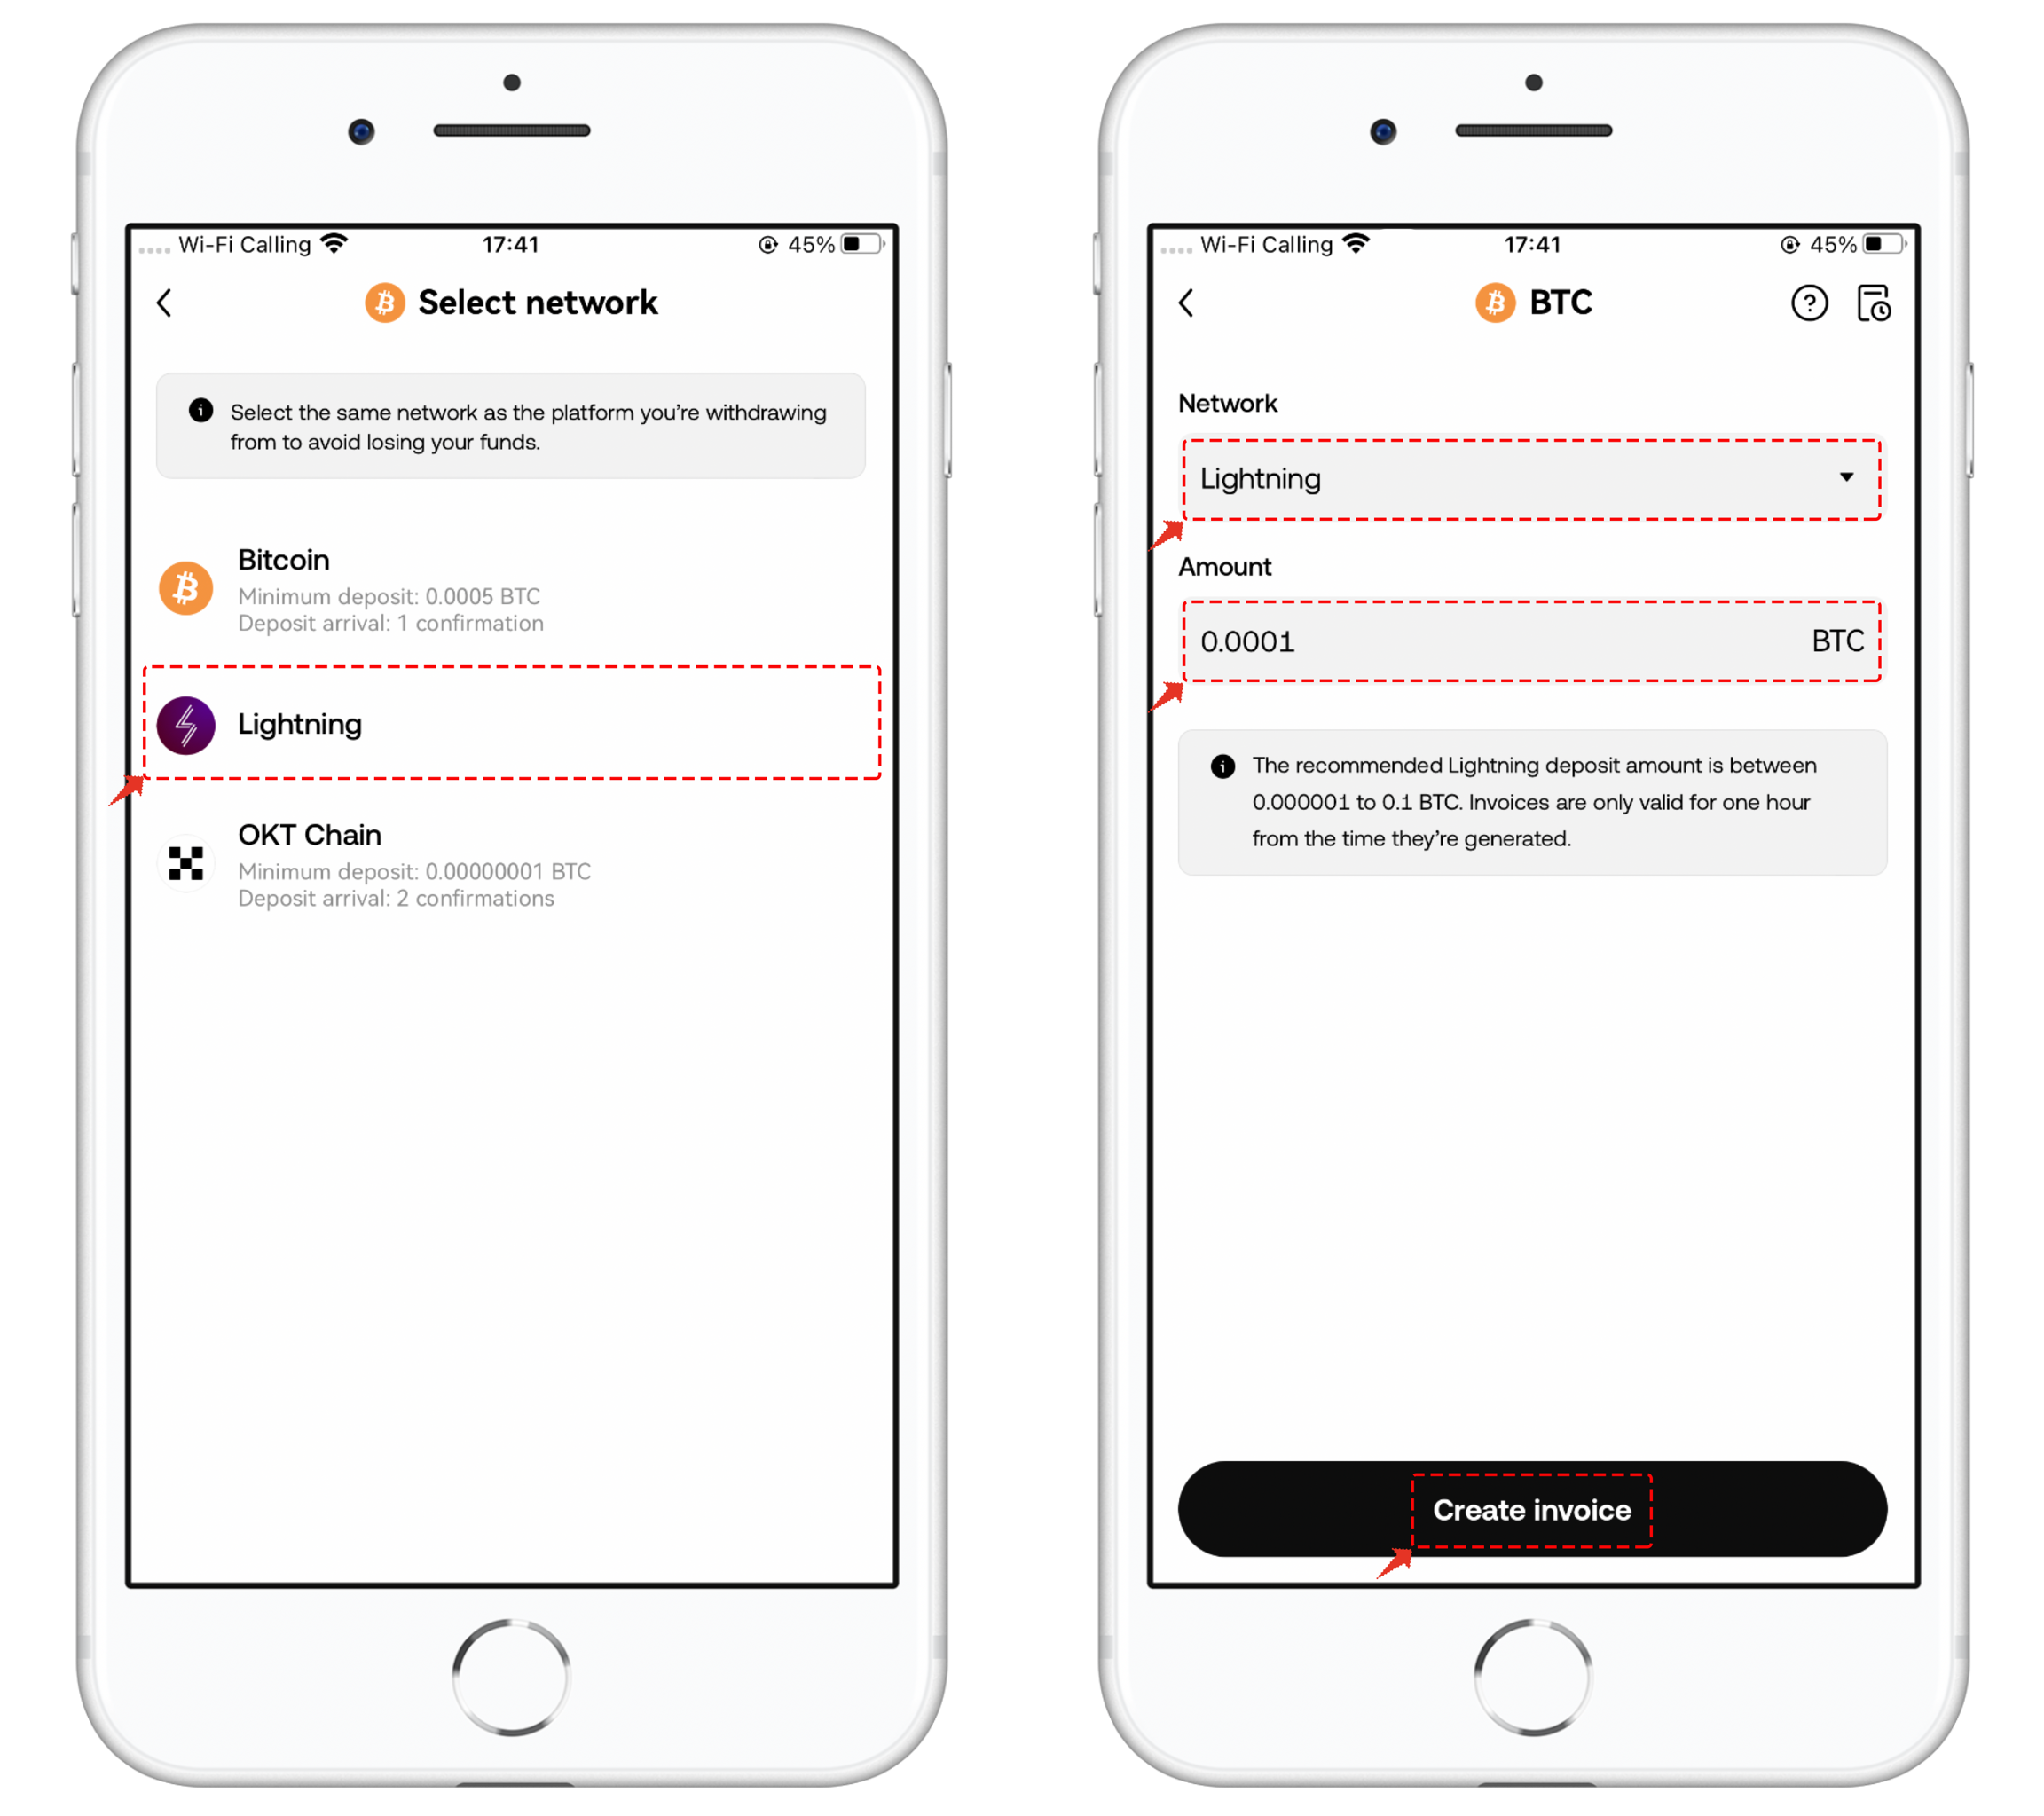
For the deposit function, Lnfi uses the Lightning Network. When performing a deposit, pay attention to the token amount range. Once set, click [Create Invoice] .
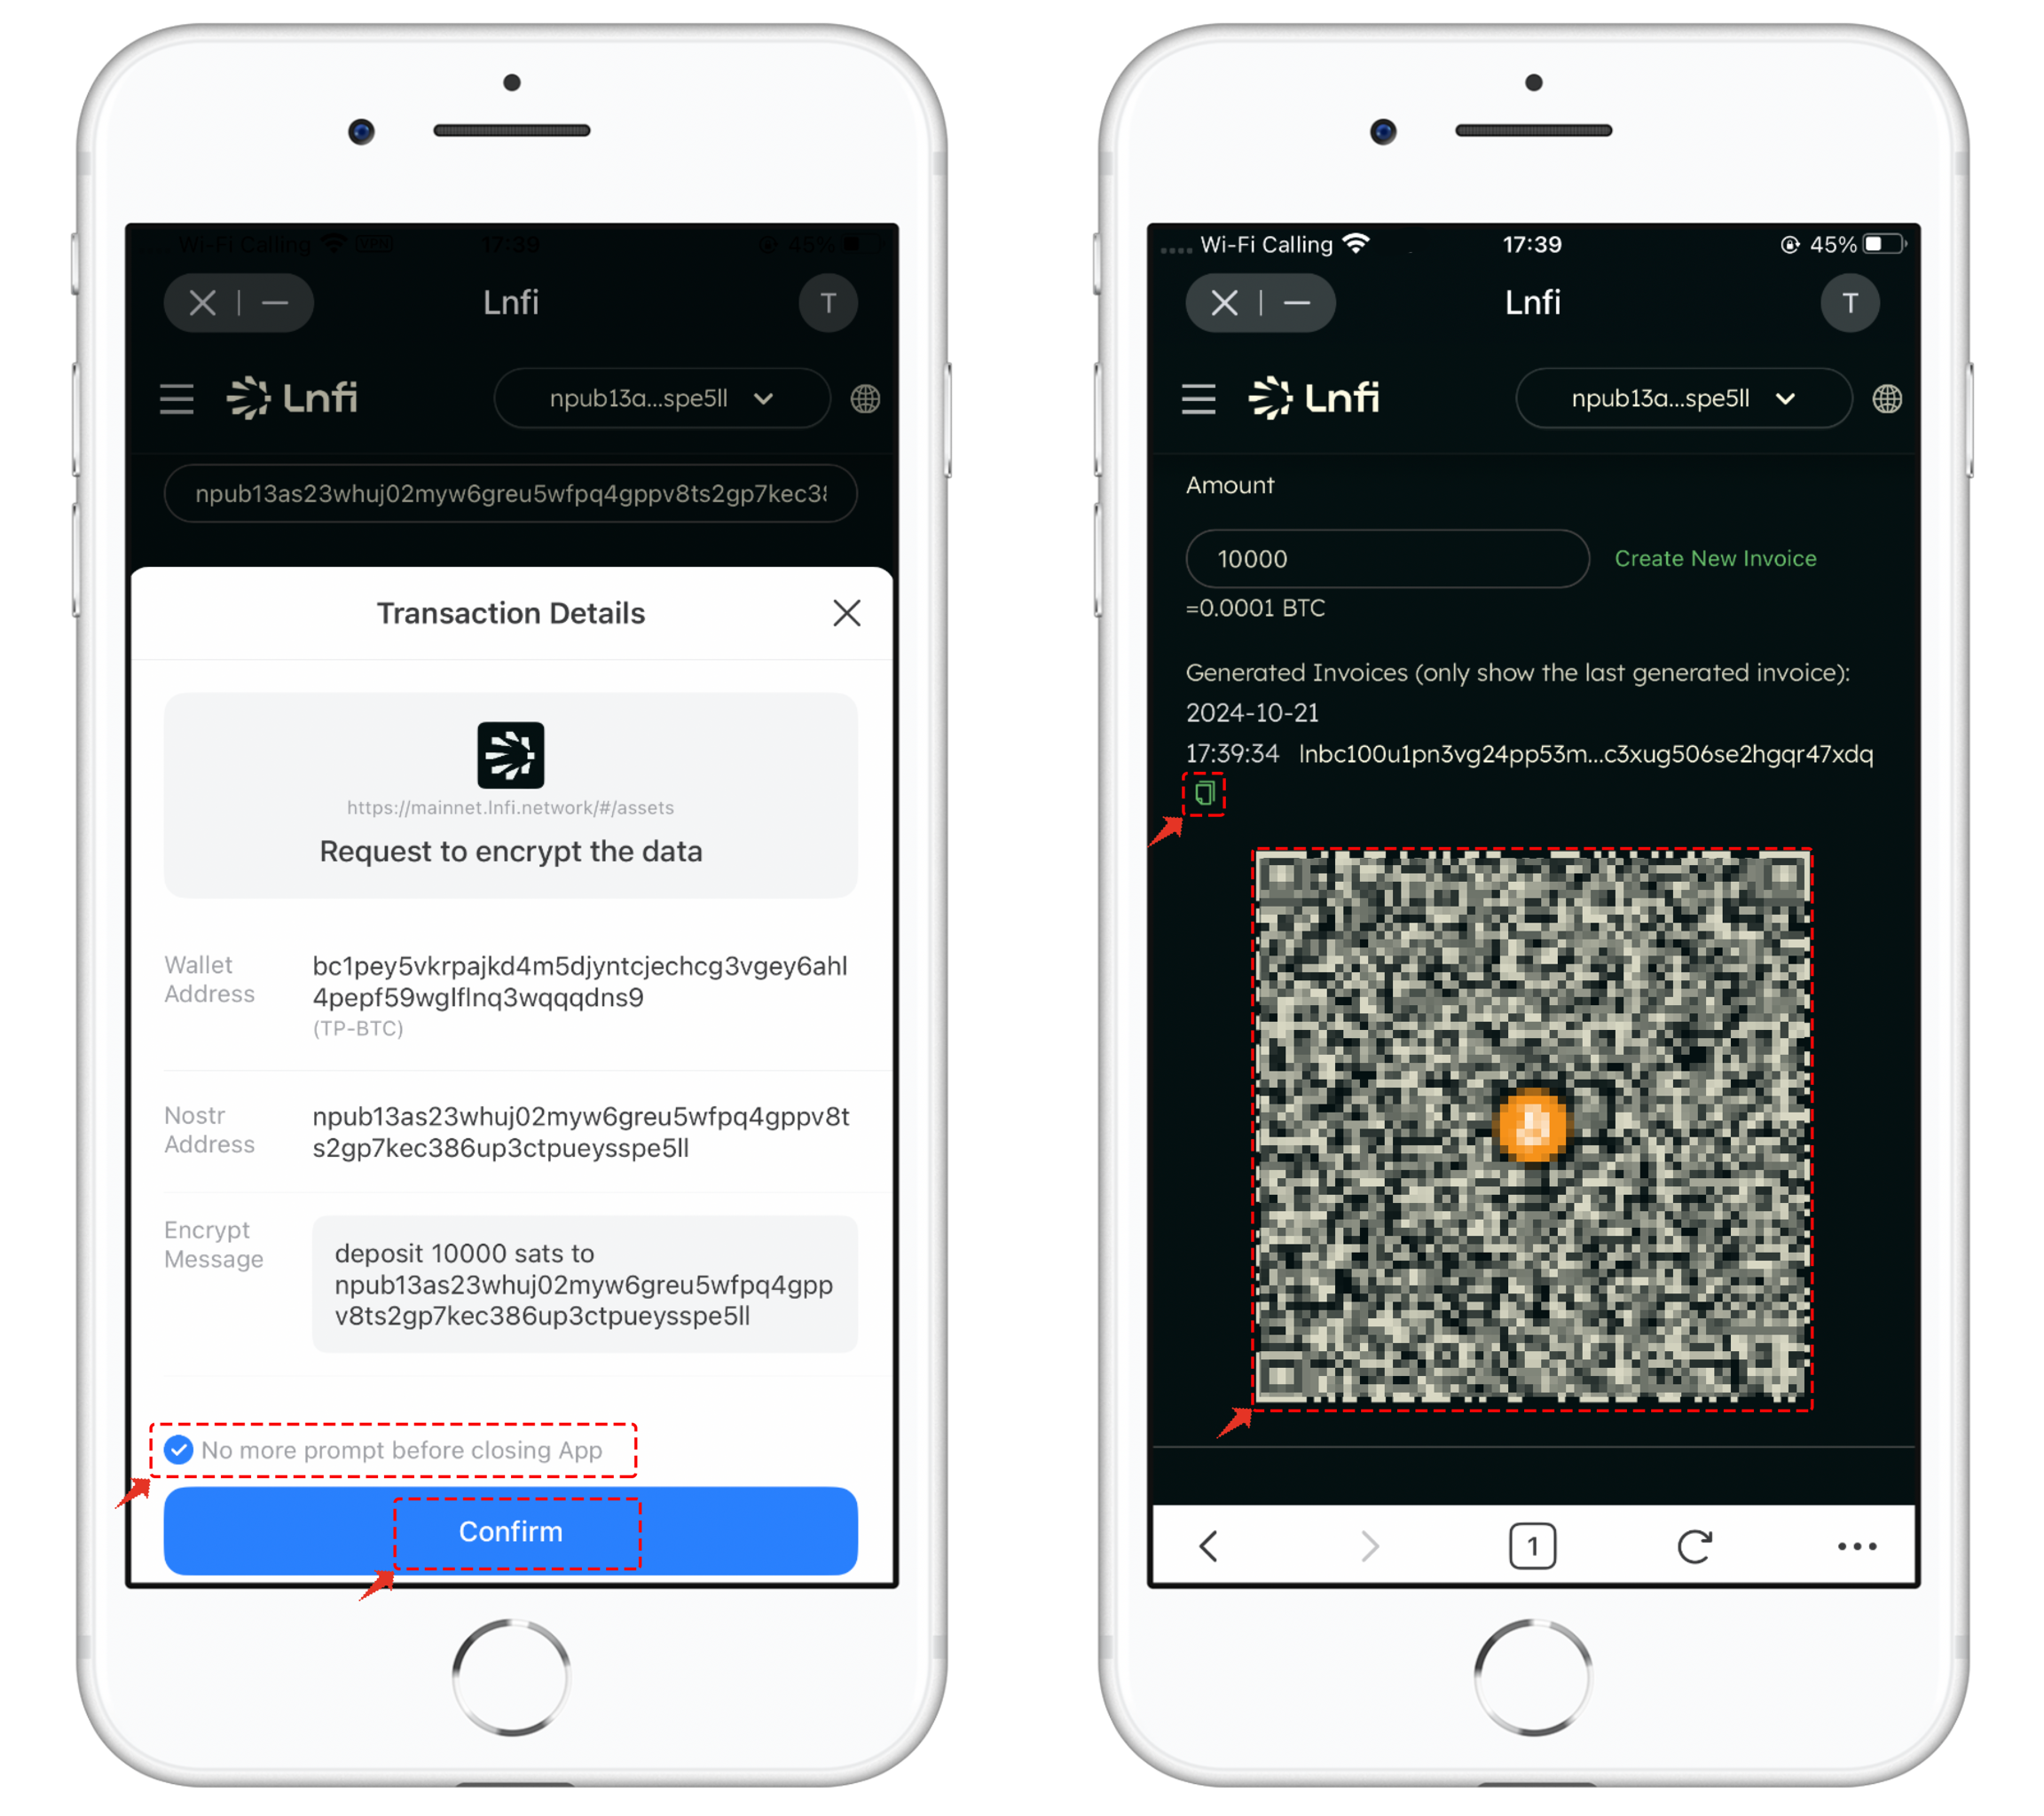
4. Creating an invoice requires multiple transaction signature steps. In the interface, you just need to check the option [No further confirmation required for this link request before using the app] . Once the invoice is created, a QR code and invoice details will appear.
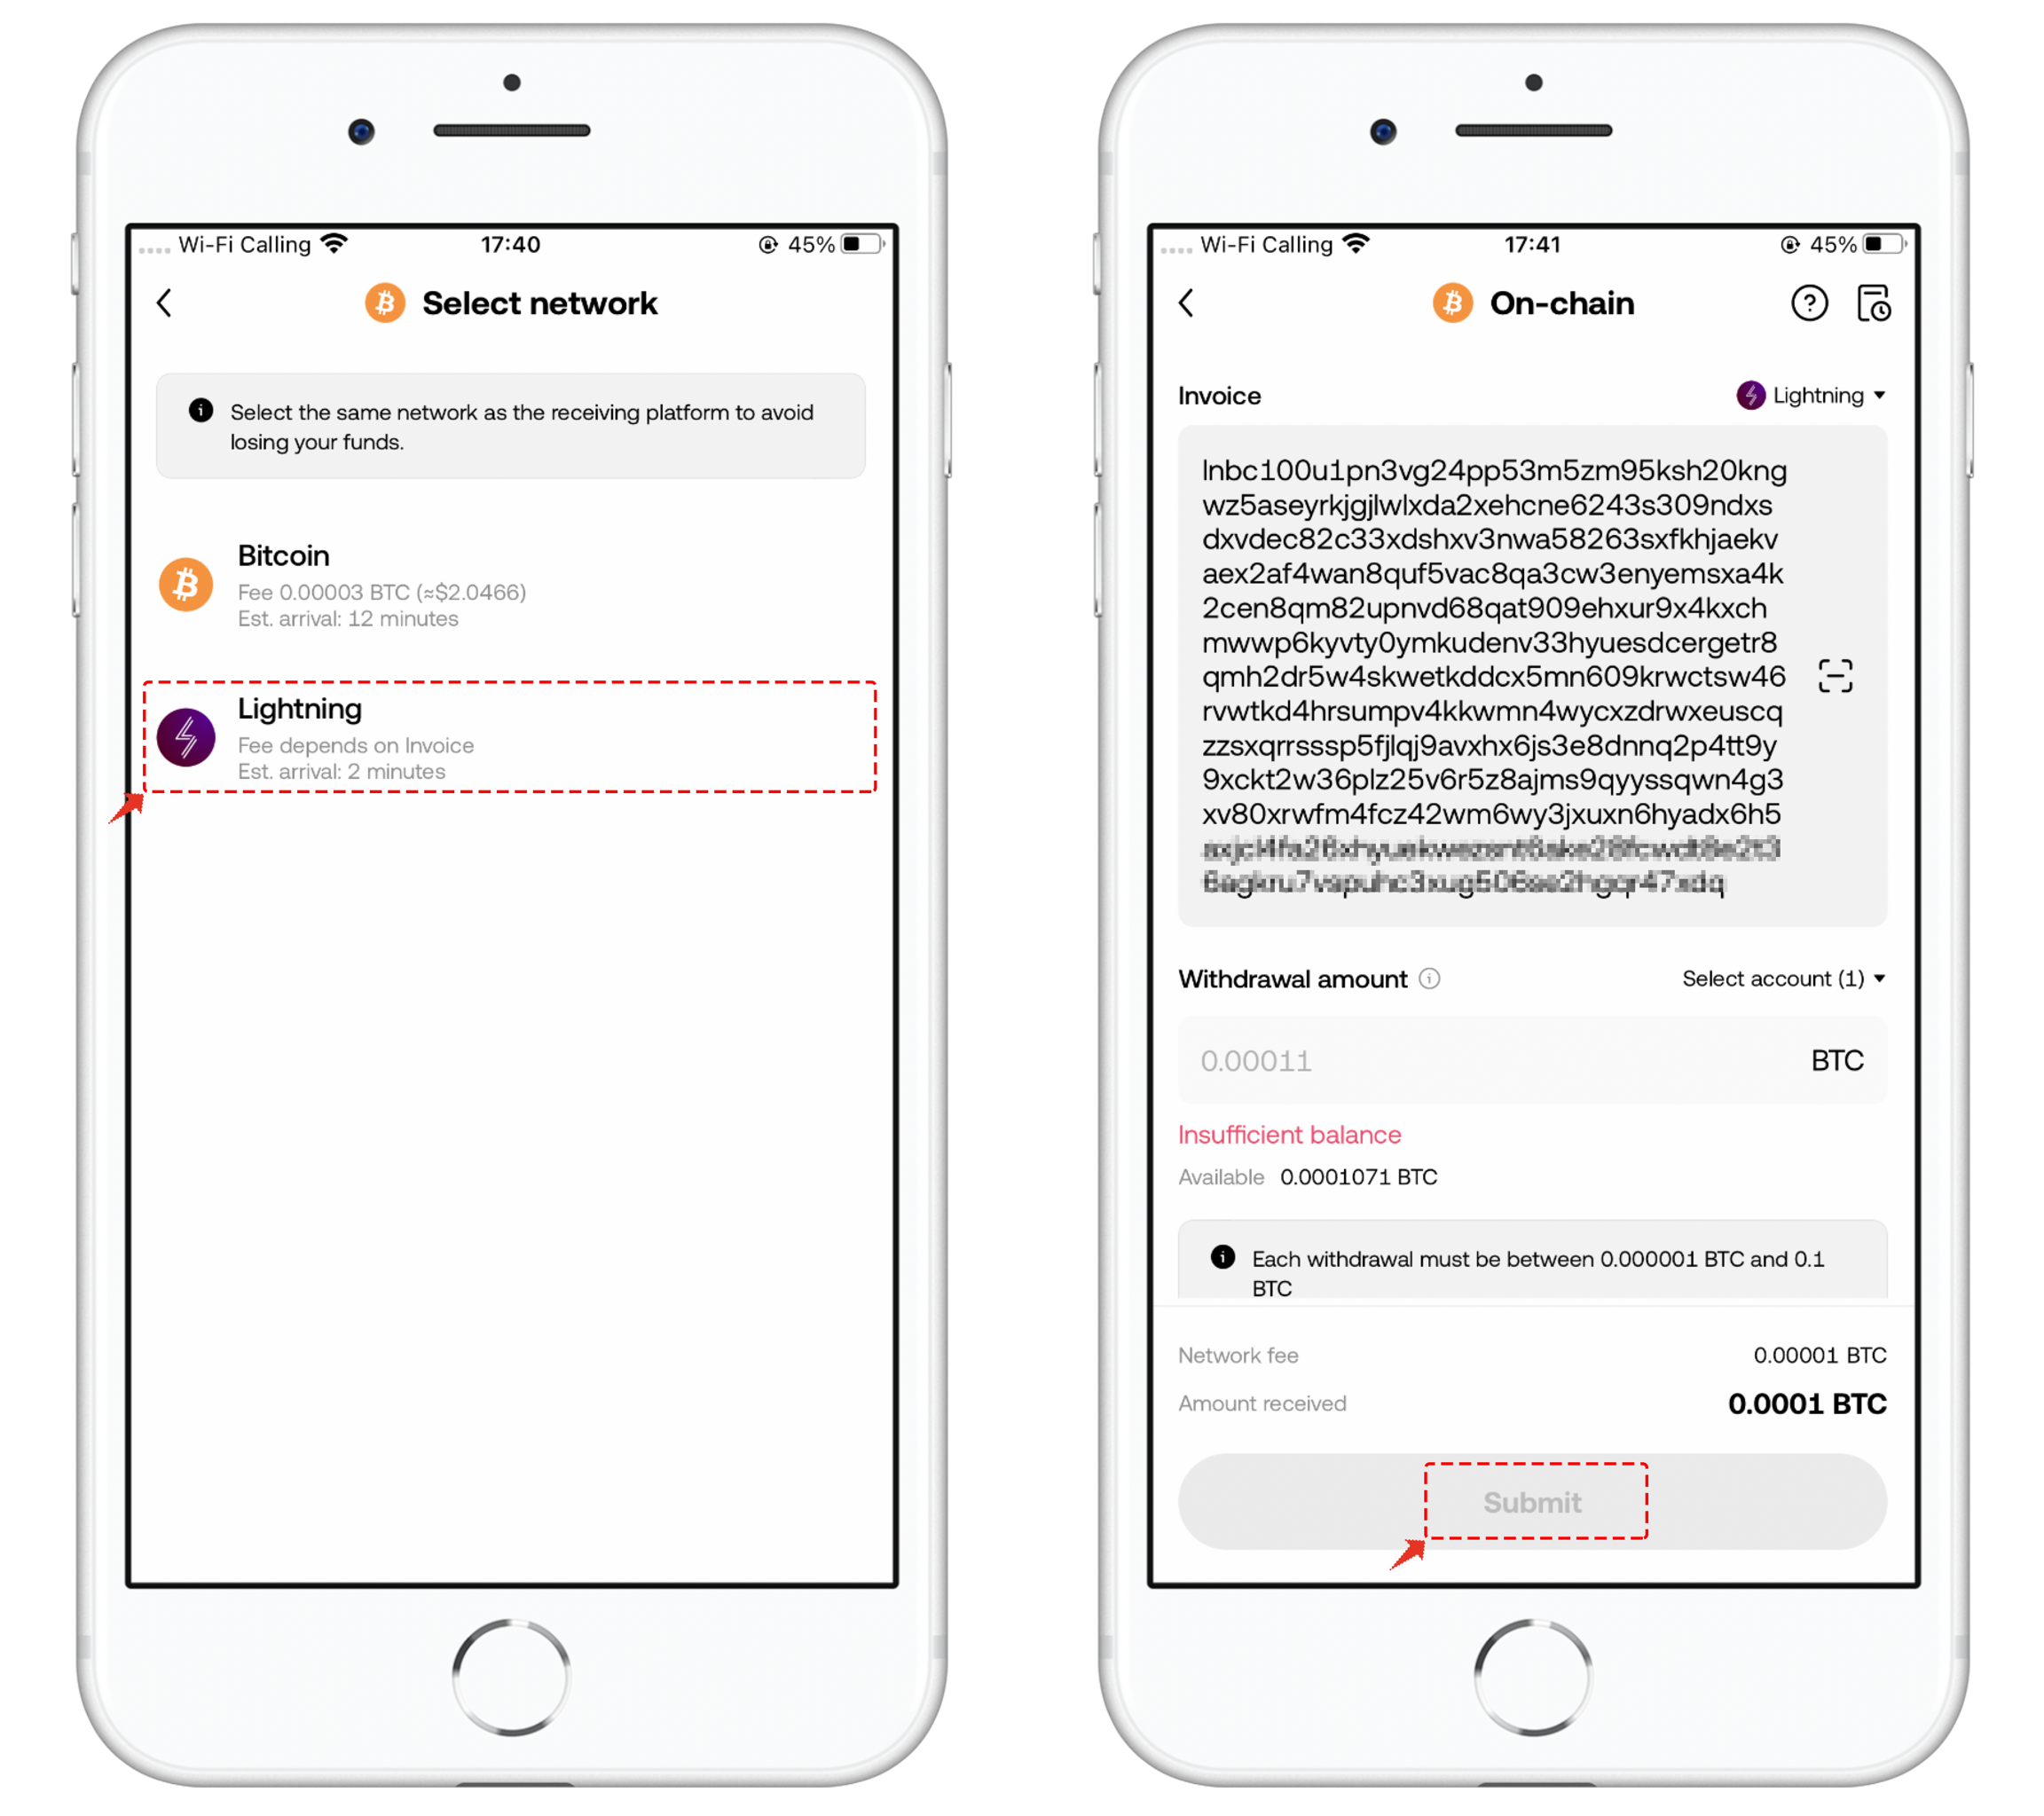
5. When withdrawing from an exchange, select the [Lightning] network, input the invoice details, and set the amount. Finally, click [Submit] to complete the deposit operation in Lnfi.
LNFI Withdrawal Guide
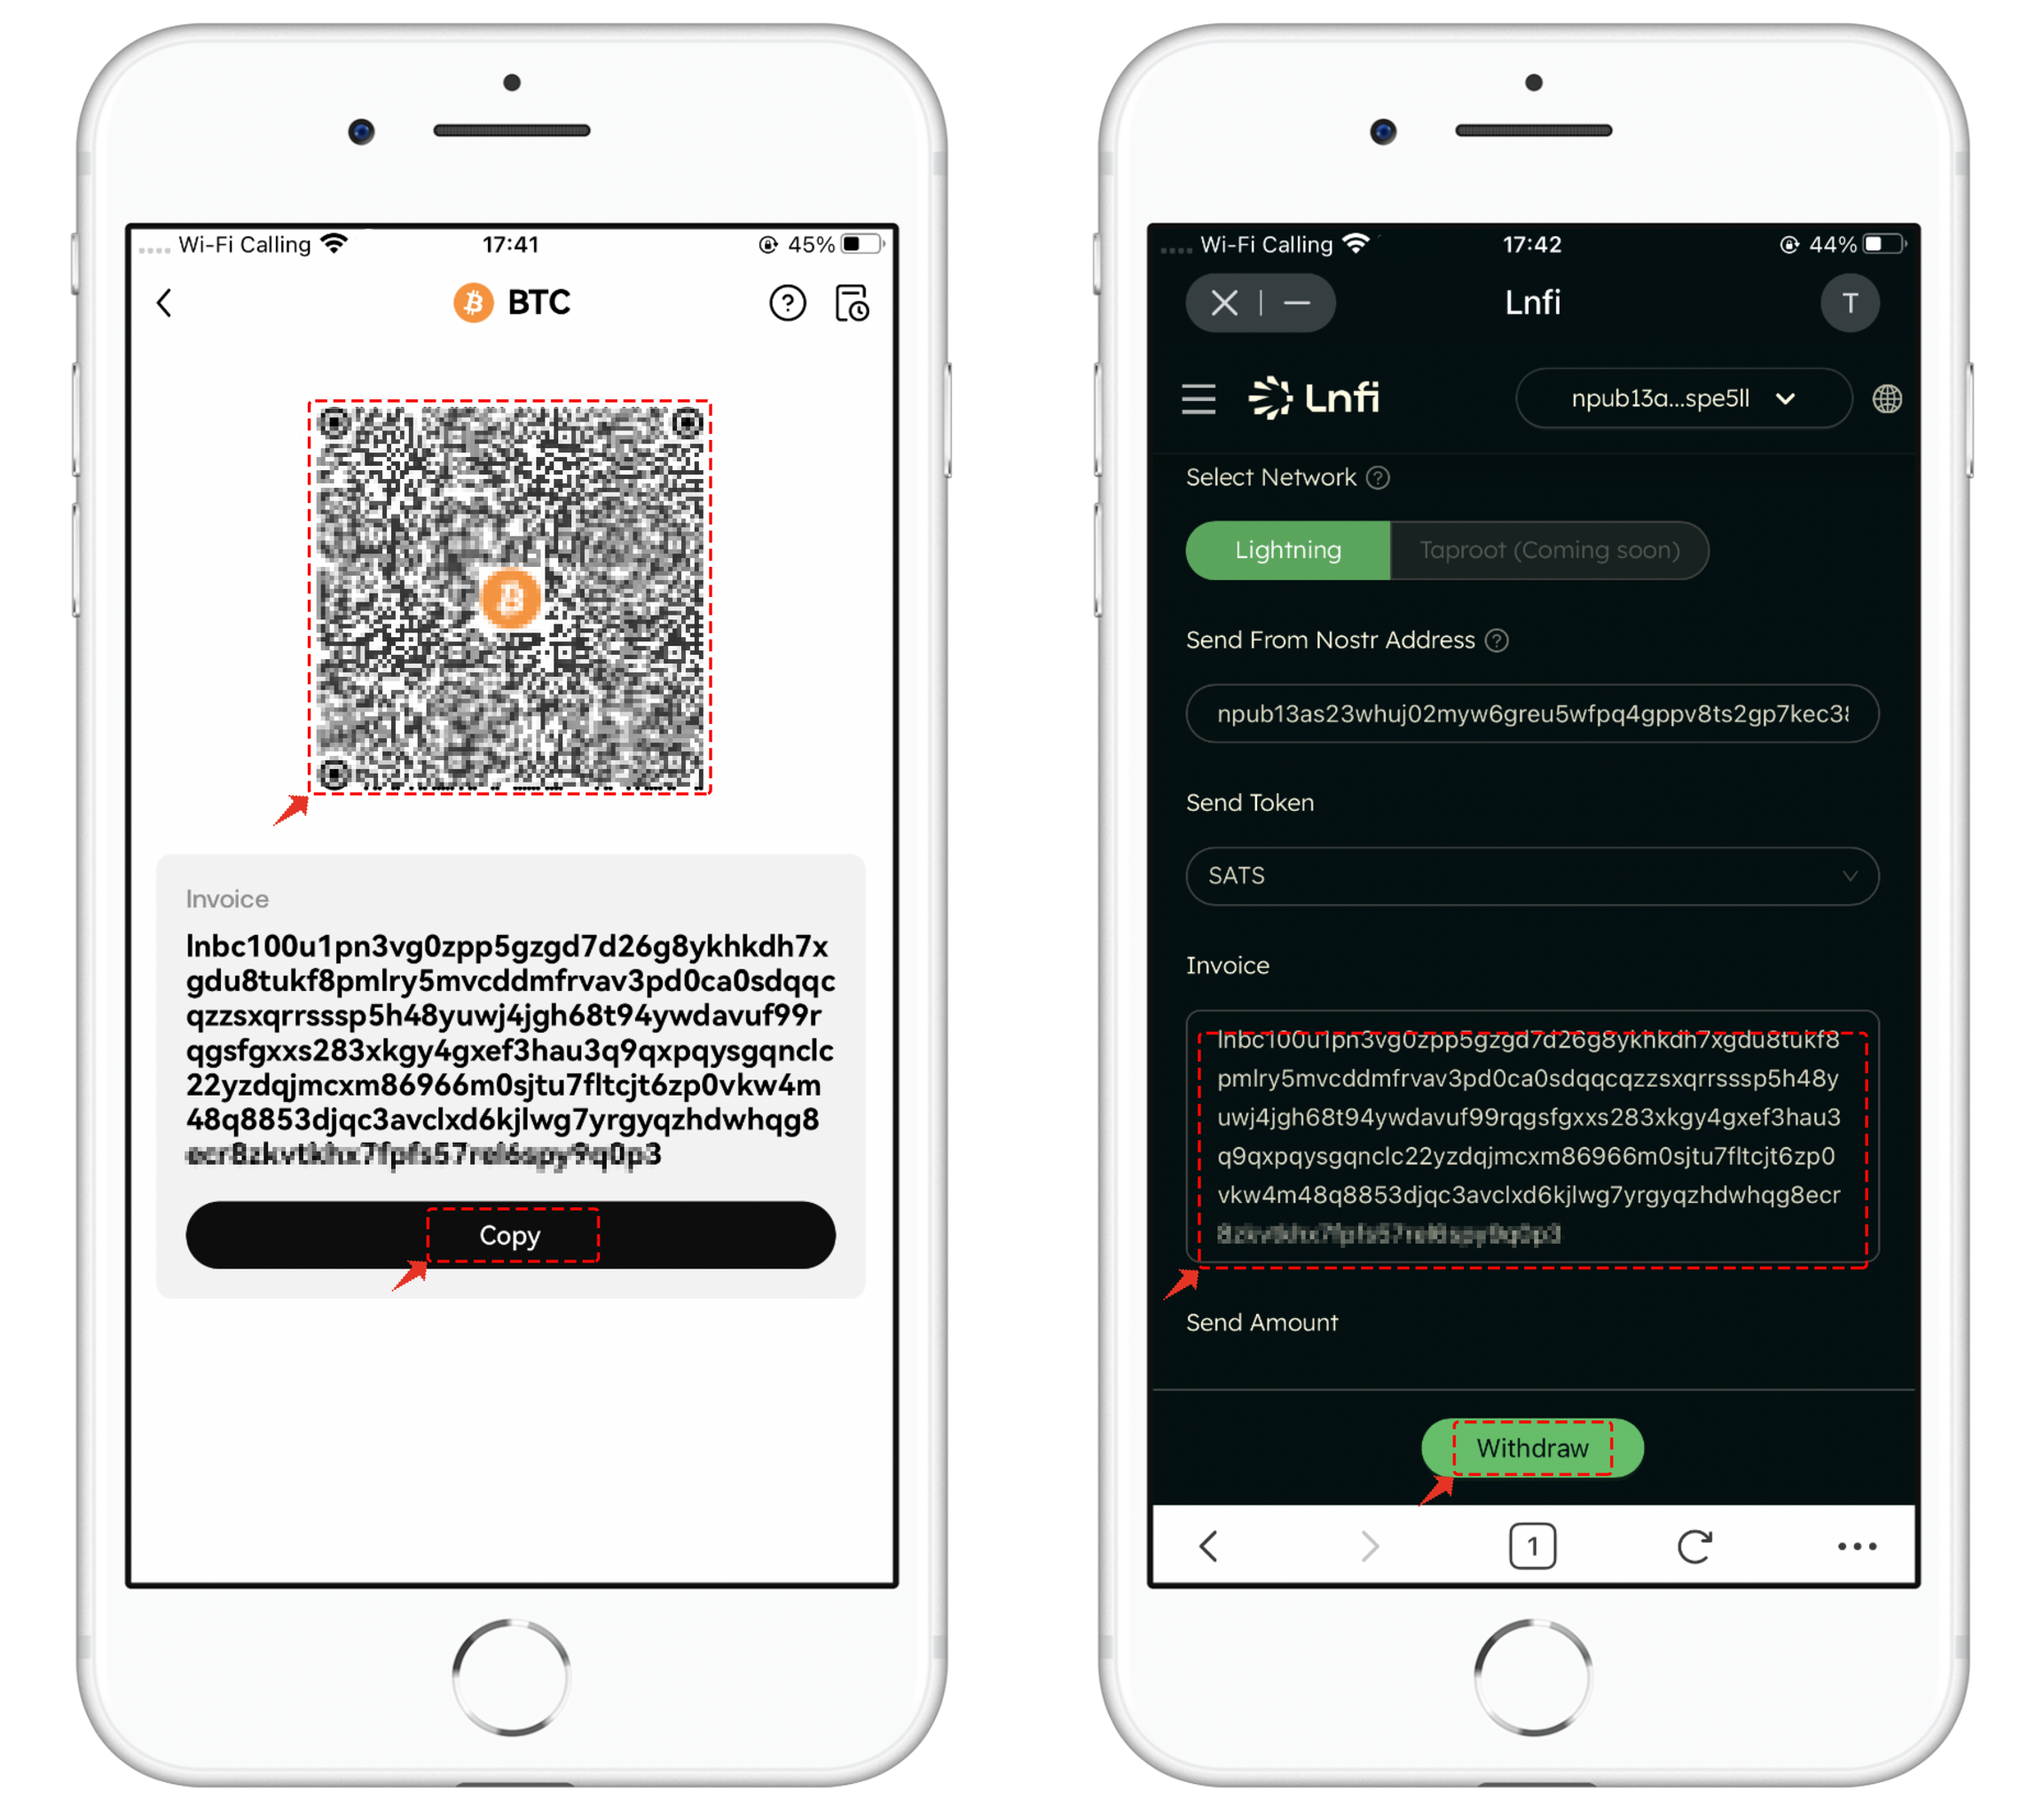
- For exchange deposits, select the [Lightning] network, set the deposit amount, and click [Generate Invoice] .
2. After execution, you will receive the invoice content and a QR code. You can copy the invoice content into Lnfi’s withdrawal interface, verify the information, and click [Withdraw] to complete the withdrawal process in Lnfi.
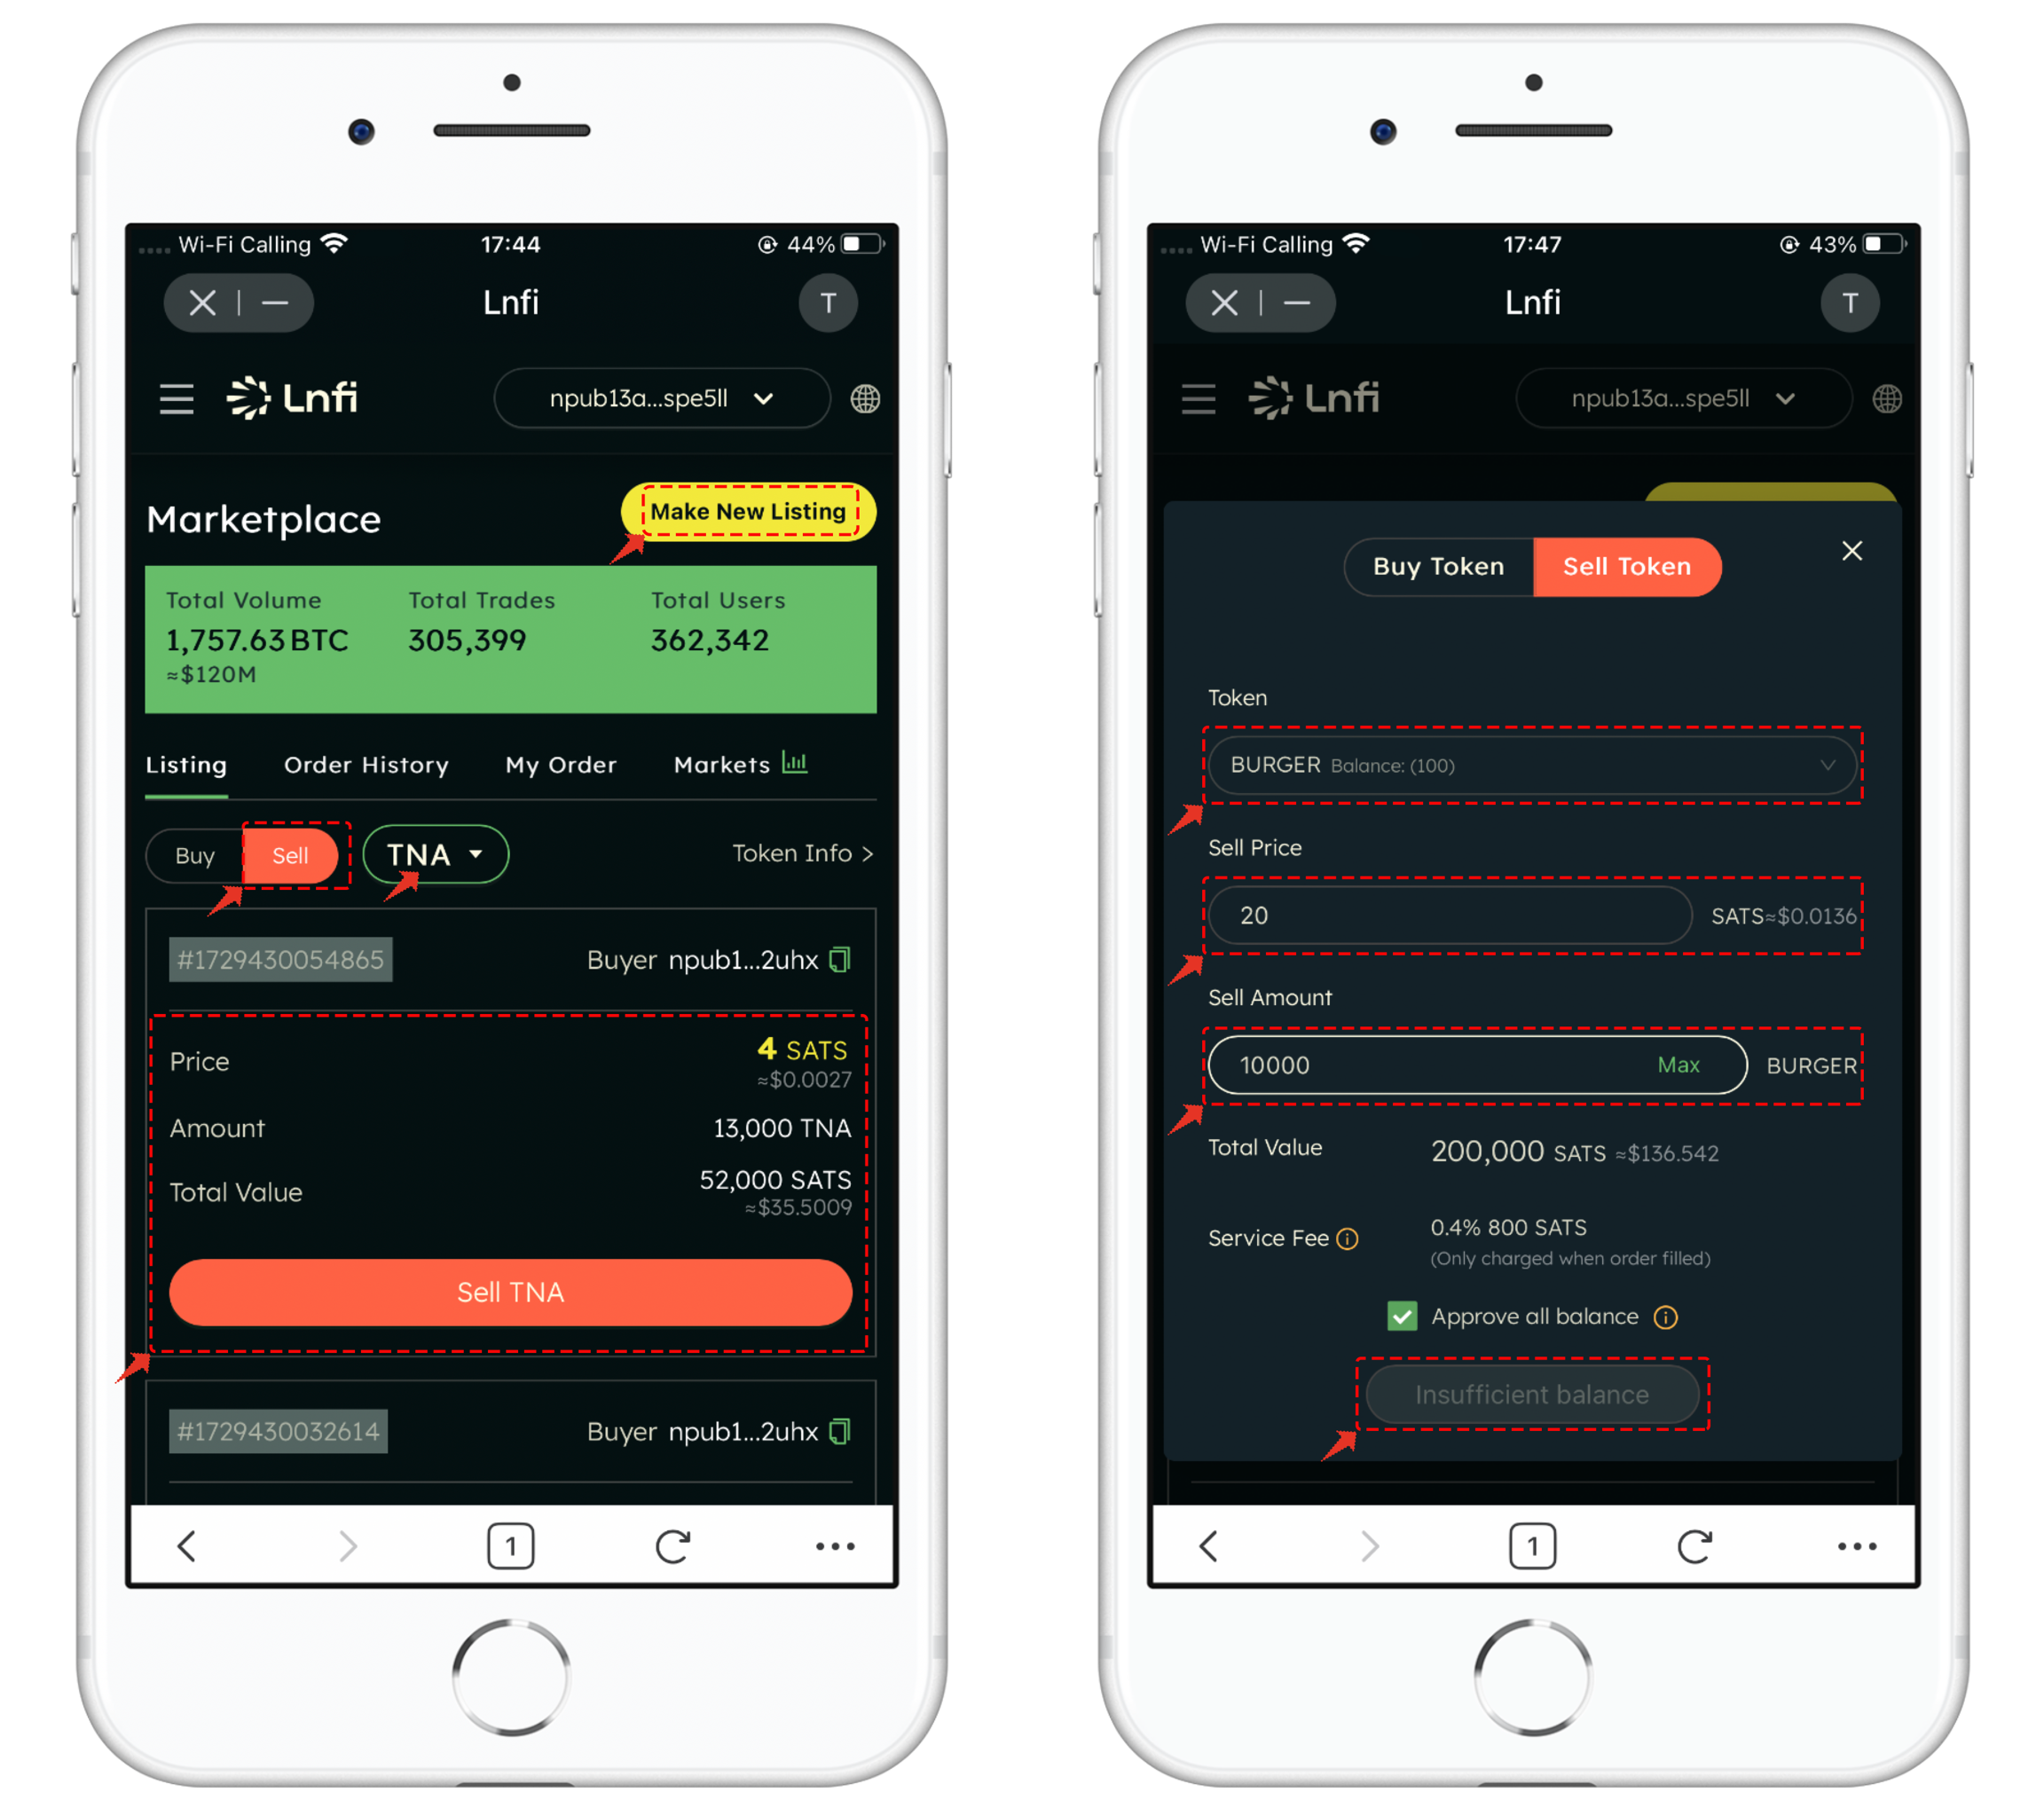
LNFI Trading Guide
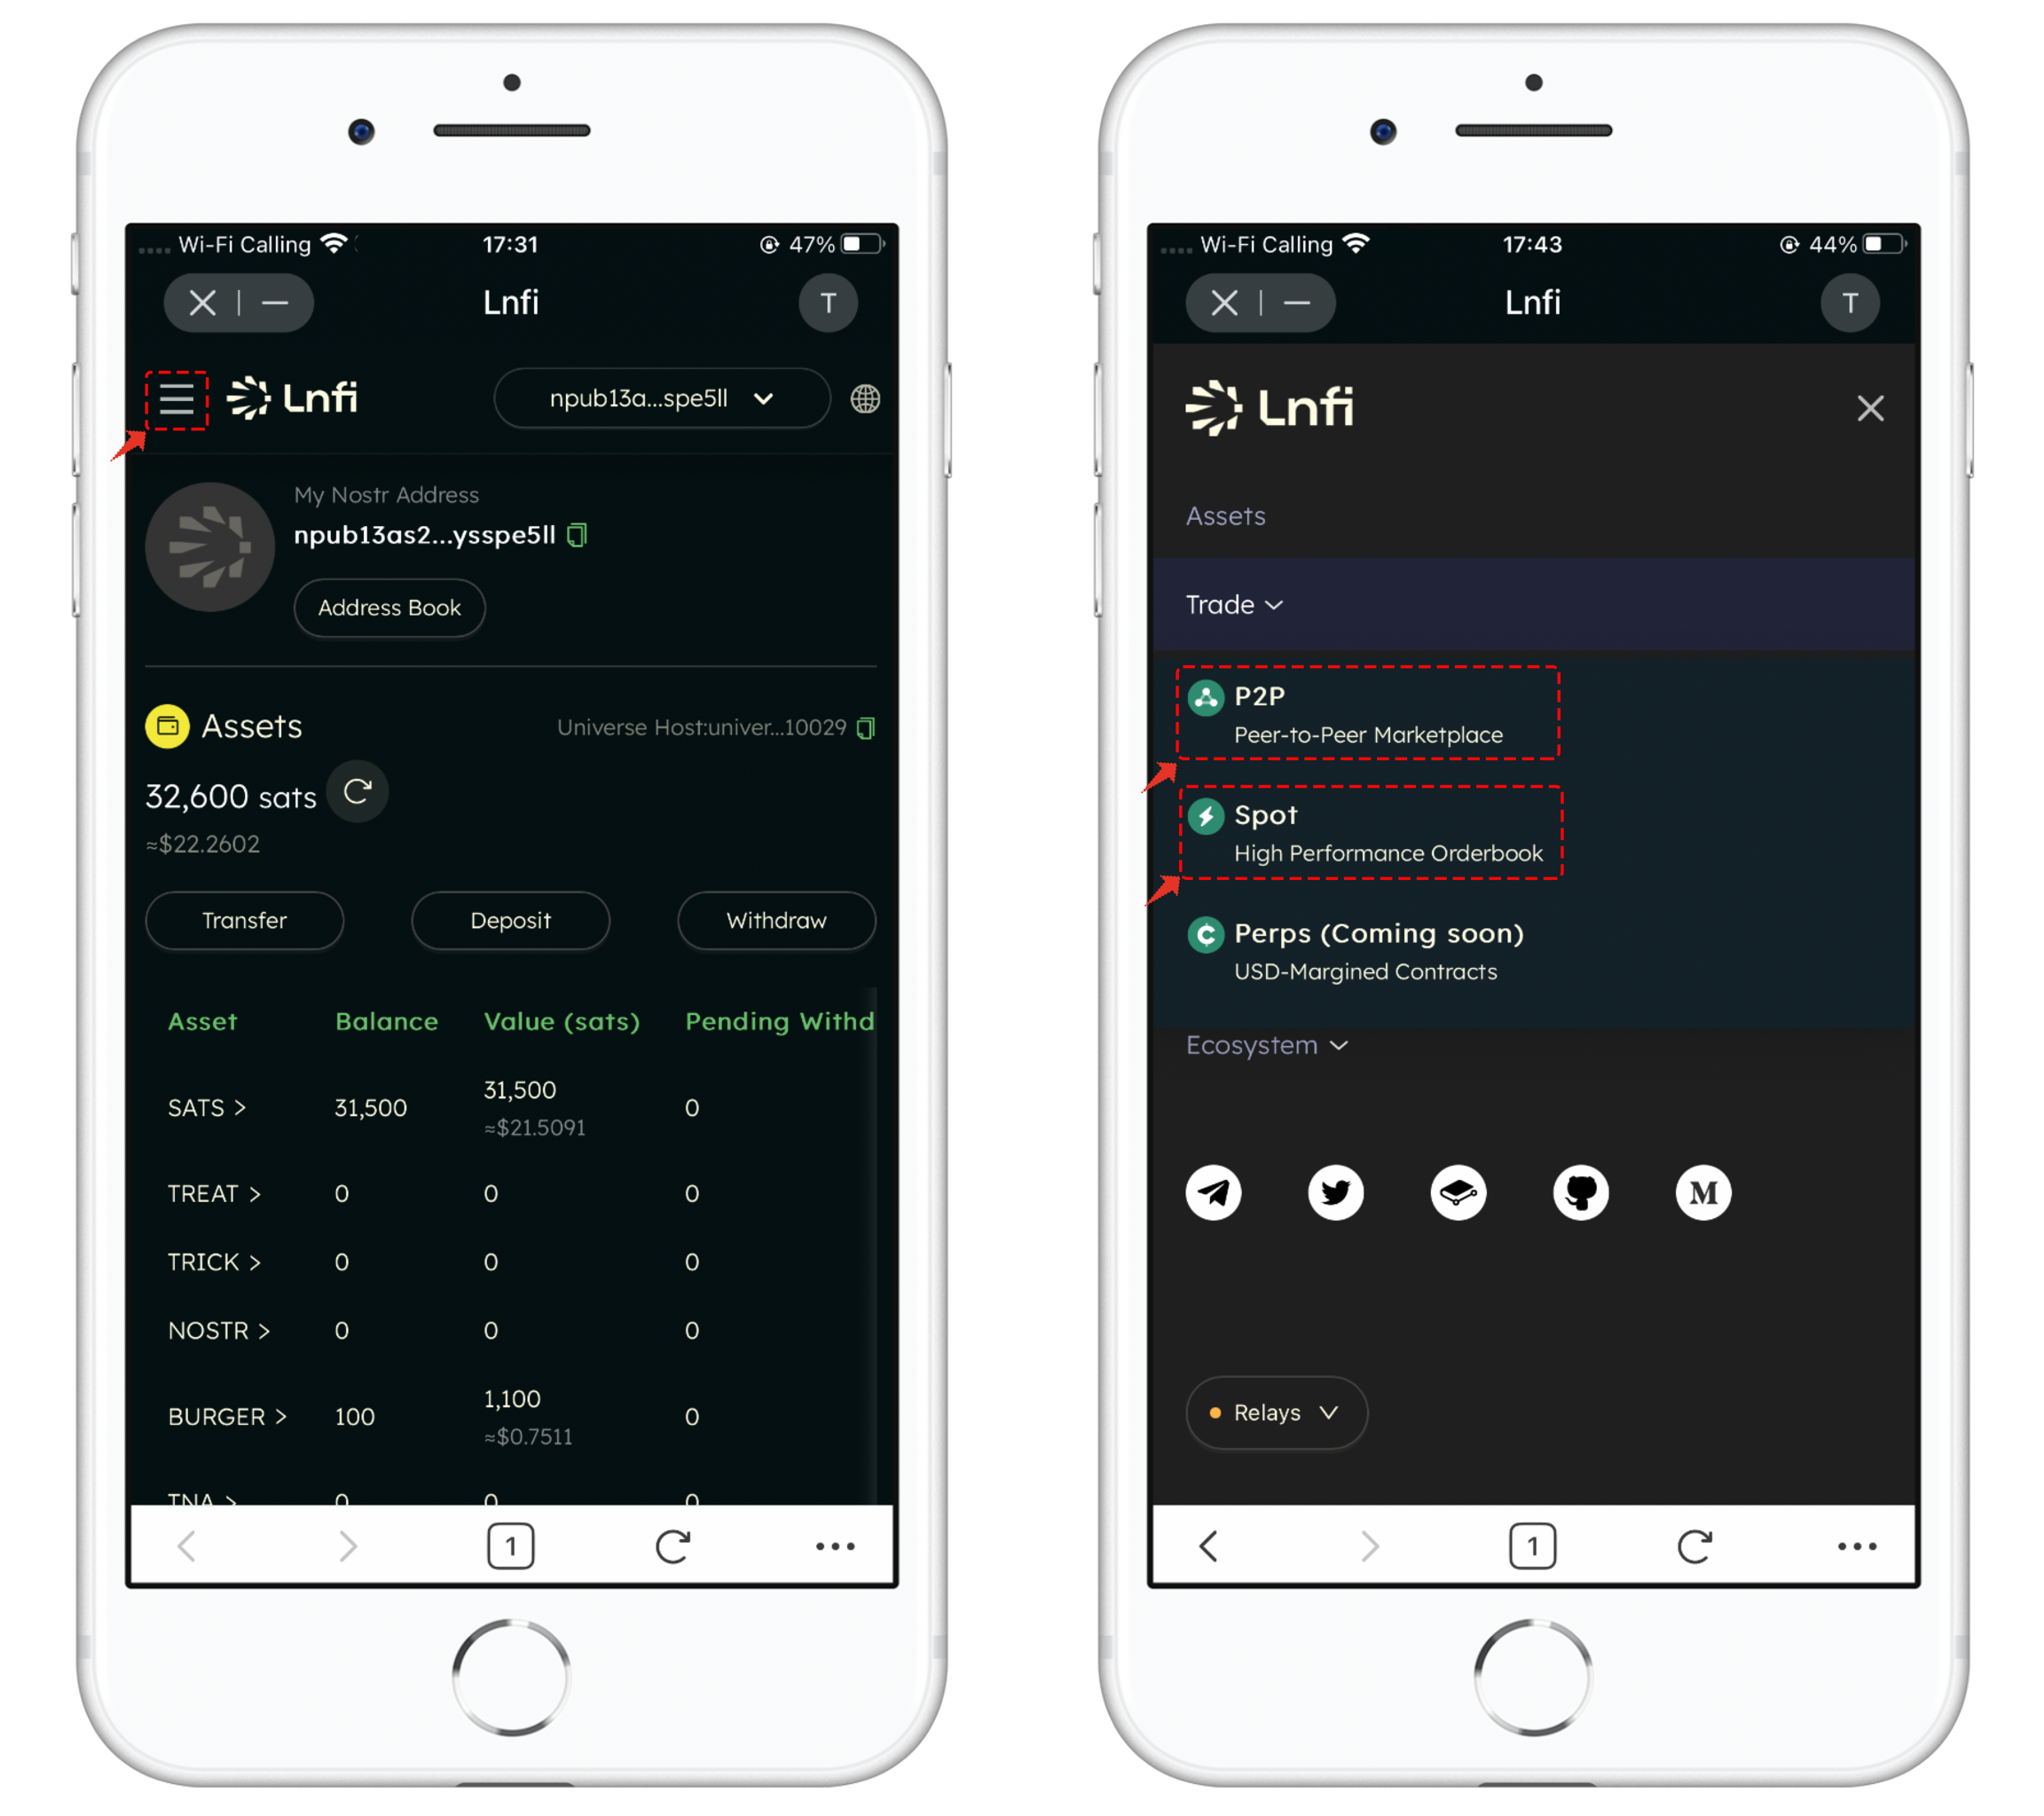
- Open Lnfi, click the top left menu, and select [Trading] to view two available trading methods.
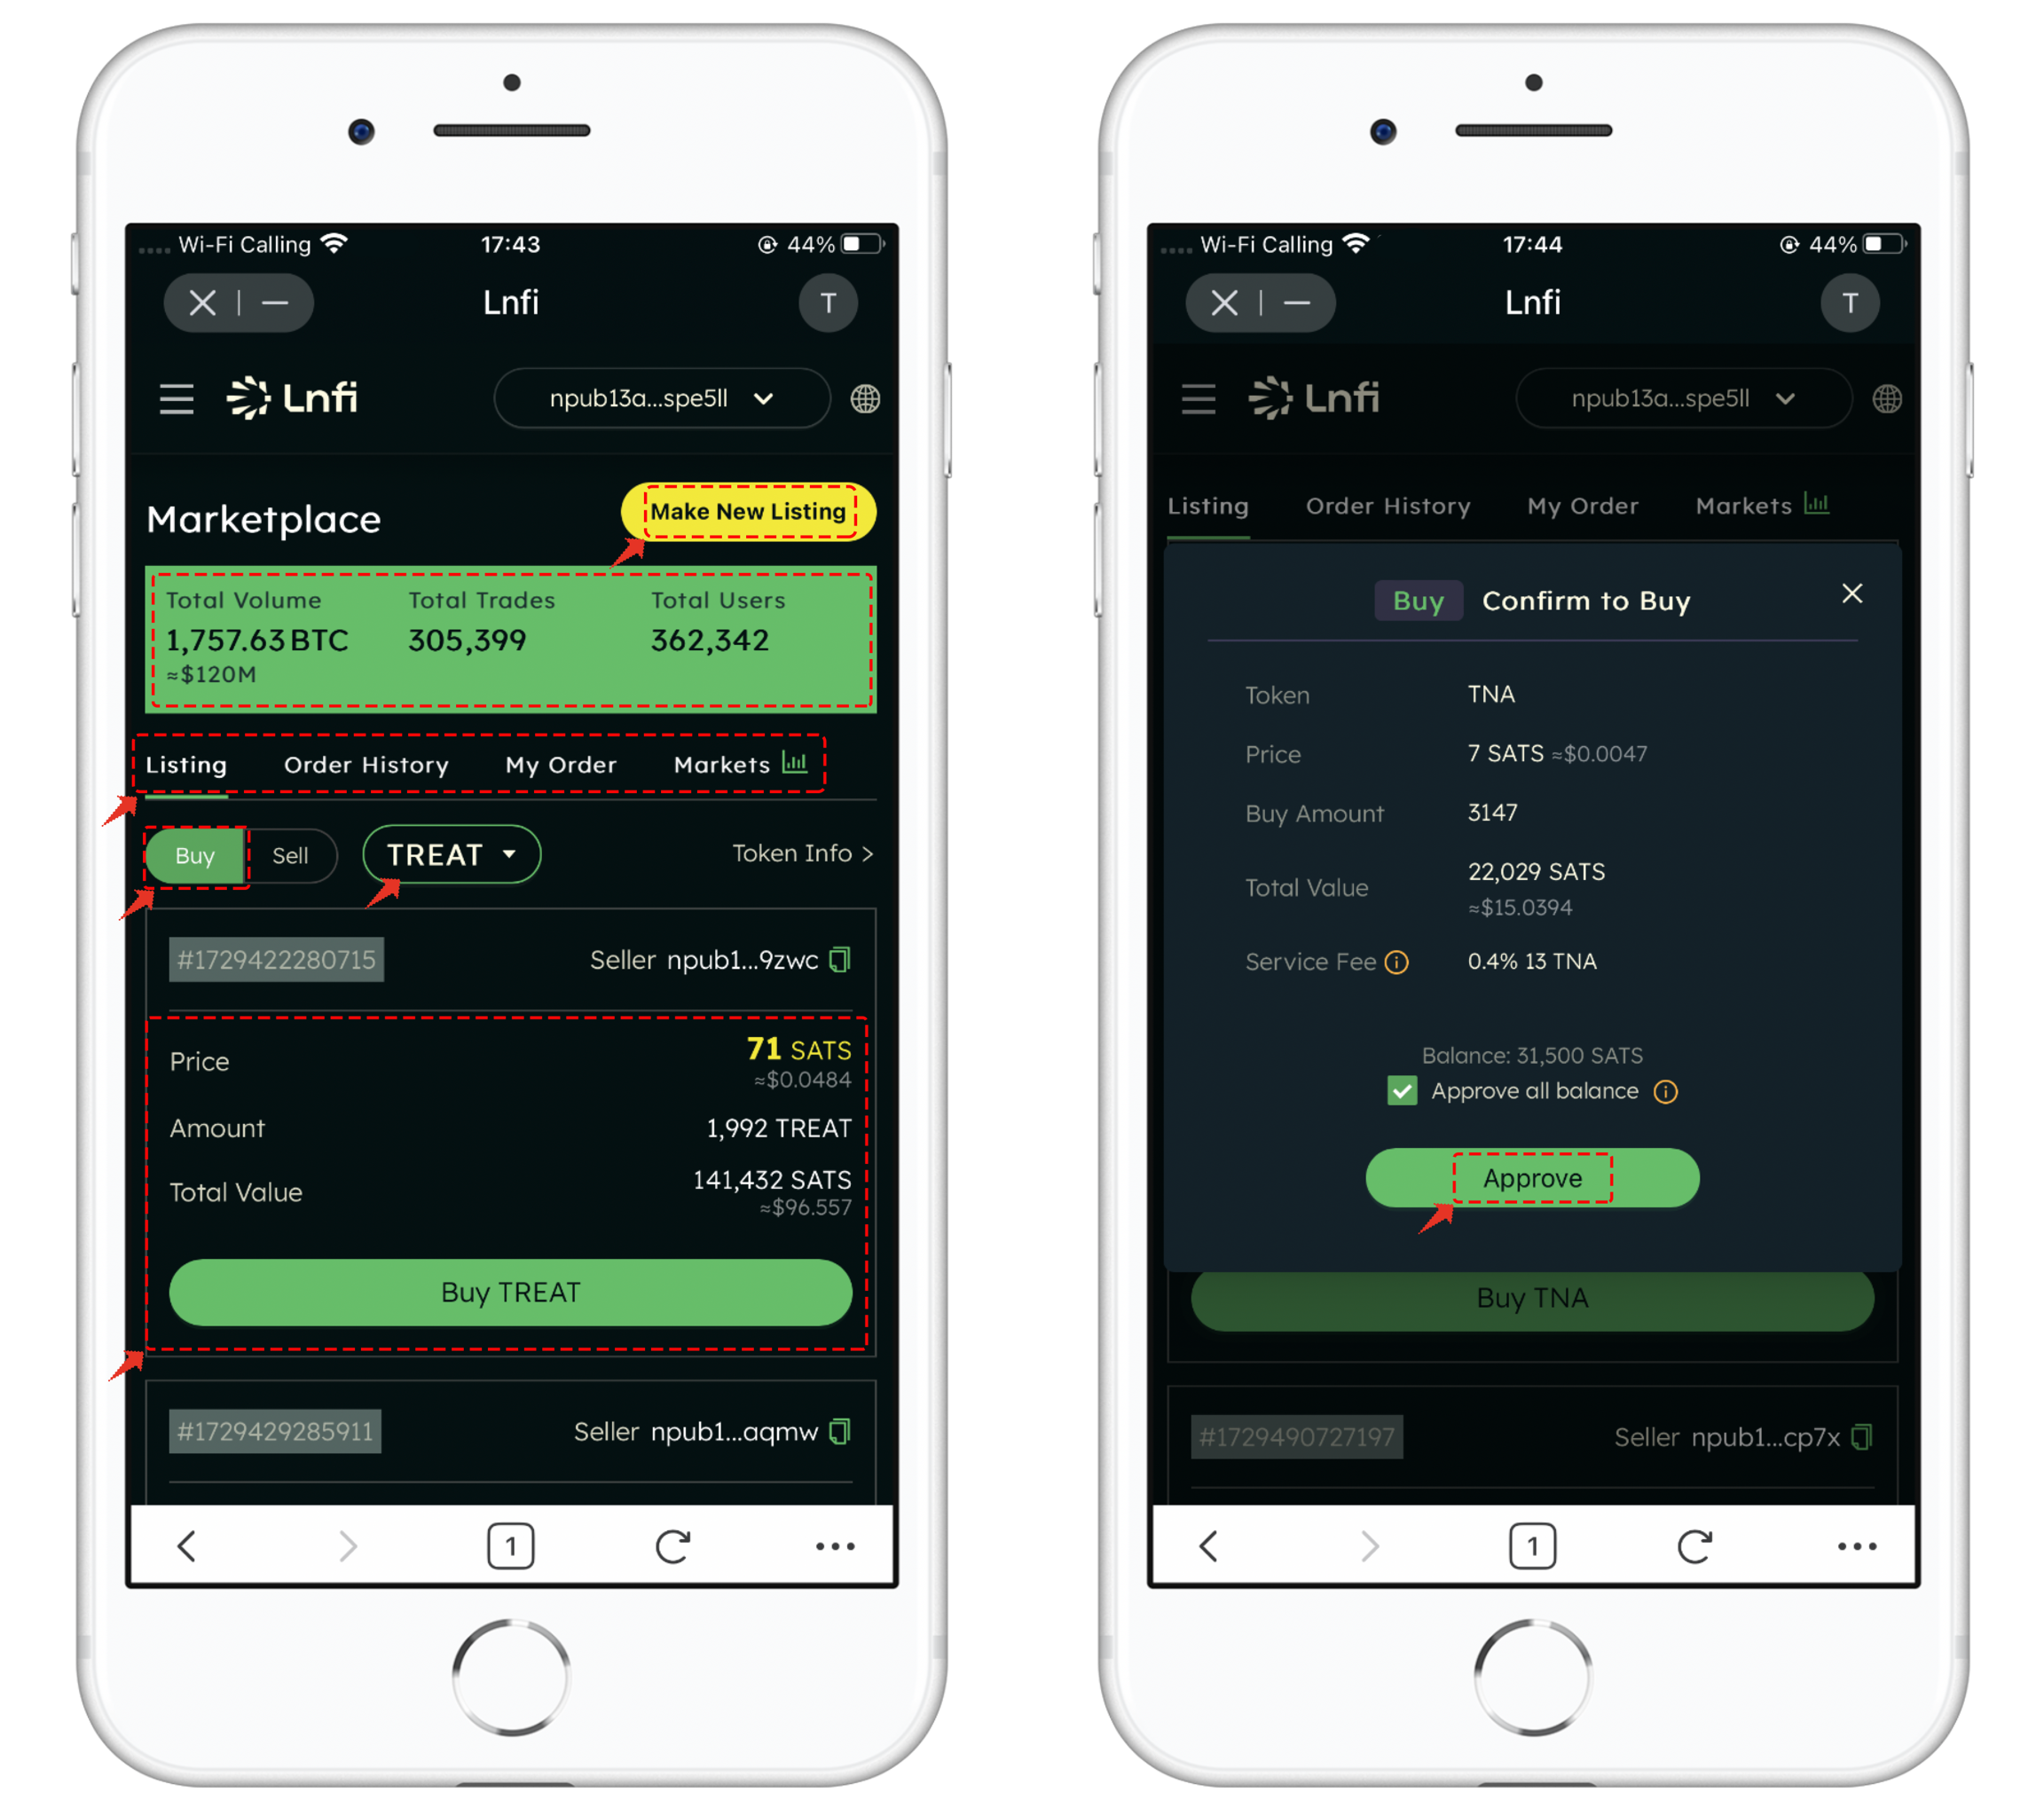
2. For P2P trading , enter the marketplace interface. The layout is user-friendly, with menus for trade data, order history, and more displayed at the top. Based on your needs, you can select orders. By default, the interface is set to buying mode. Simply select the token you wish to purchase, then find a suitable order in the list, considering factors like price and quantity. After clicking [Buy Tokens] , the purchase interface will appear. Authorization is required for the first time; after authorization, click [Buy Tokens] again to quickly complete the trade.
If the available price or quantity doesn’t meet your needs, you can click [Create Order] to set your own parameters.
3. Selling tokens works in a similar way. You can select suitable content from the list for trading. If there are no matching orders, you can create a custom sell order by selecting [Create Order] , setting the quantity and price, completing the authorization, and posting the order.
If you wish to cancel an order, click [My Orders] to manage them from the list.
4. Another method is spot trading, which users can explore further if interested.


评论 (0)